

My hubs wants to start this new tradition of collecting ornaments – one for each year – to represent that year of our marriage. I thought it was a great idea, but I have a hard time buying ornaments because I don’t like most of them, haha. I’ve also already mentioned in the last post that I have an issue with buying things I feel like I could make. So, I got inspired last night and decided to stitch a little ornament for this year. And what better ornament to make than a Spartan one to represent our great accomplishment in finishing the Beast in December!
You can do this with pretty much any logo or design you want, so I’ve decided to make a tutorial out of it if you’d like to give it a shot! It’s soooo easy. Even if you don’t sew I’m confident you can make this.
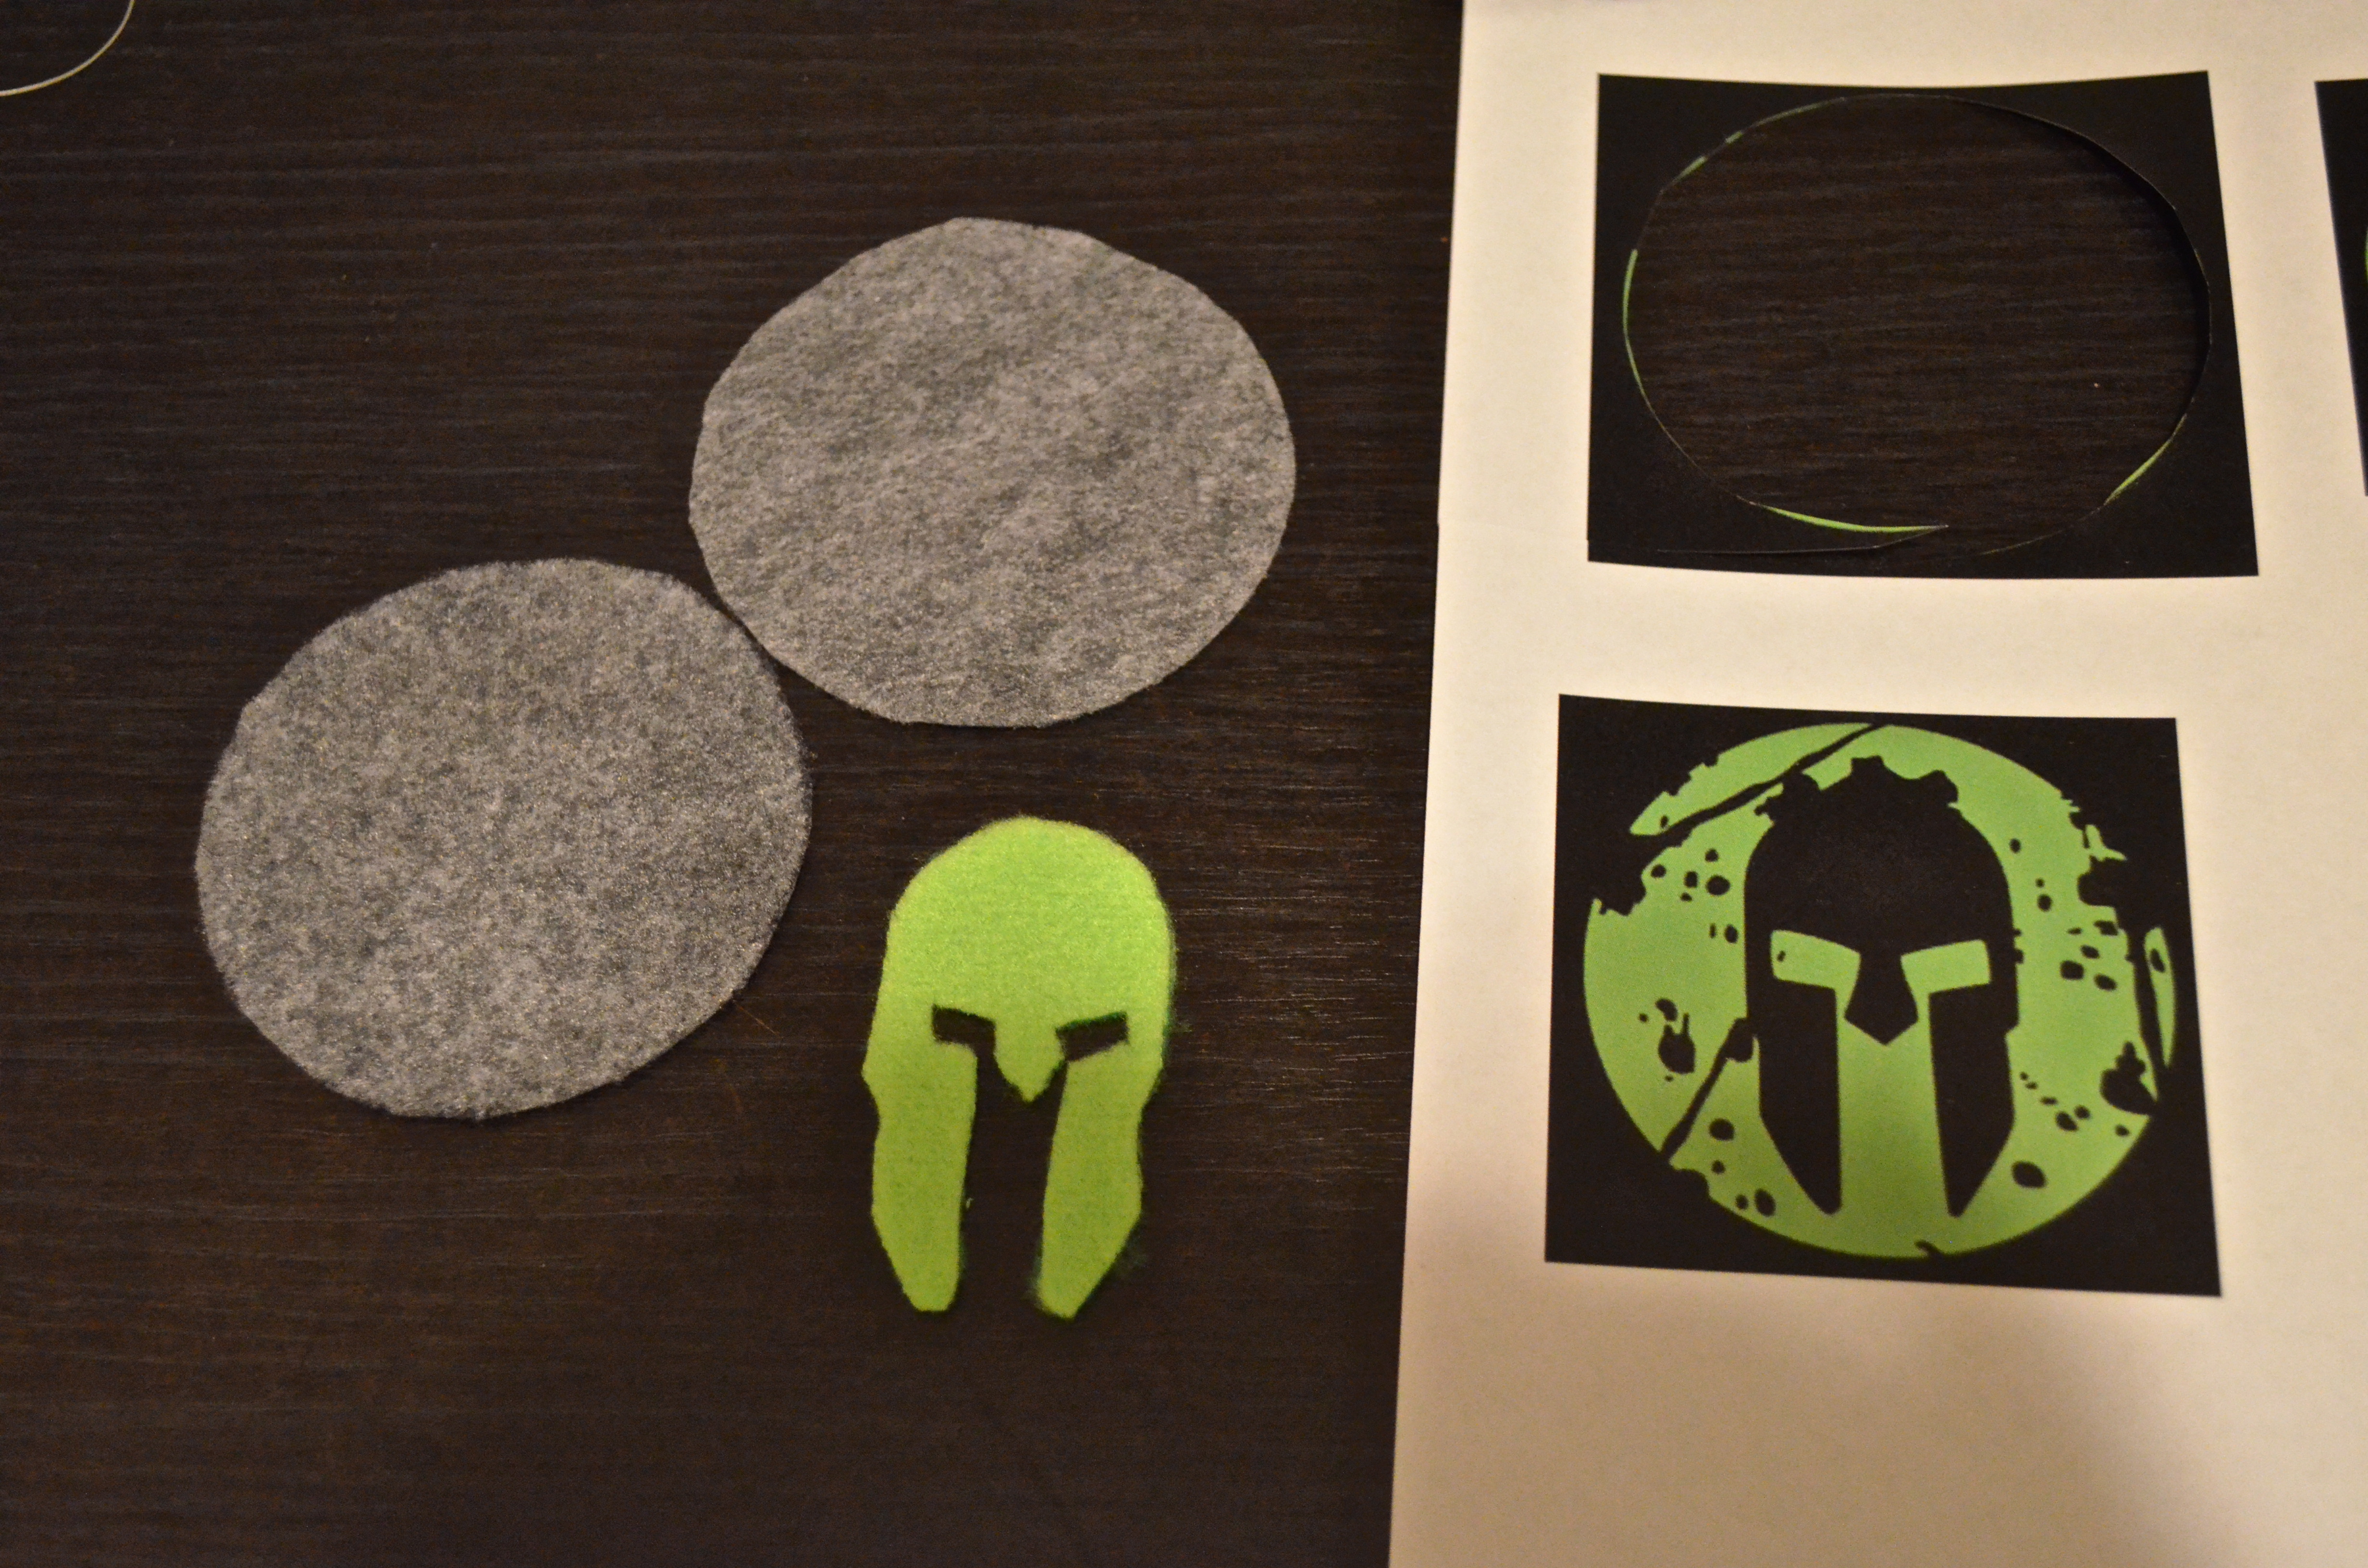
I made this ornament out of felt and a thick, upholstery thread (also a short piece of twine and a little cotton batting). I used a thick thread simply because I like the way it looks (you can see it well when you look at the ornament). It also worked out well because it didn’t break when I got to the hot glue part. I’ll explain that later.
First, cut out your materials. I printed out the Spartan Race logo and cut it to use it as a stencil. I printed several different sizes of the logo onto the same piece of paper so I’d have a few sizes to choose from.
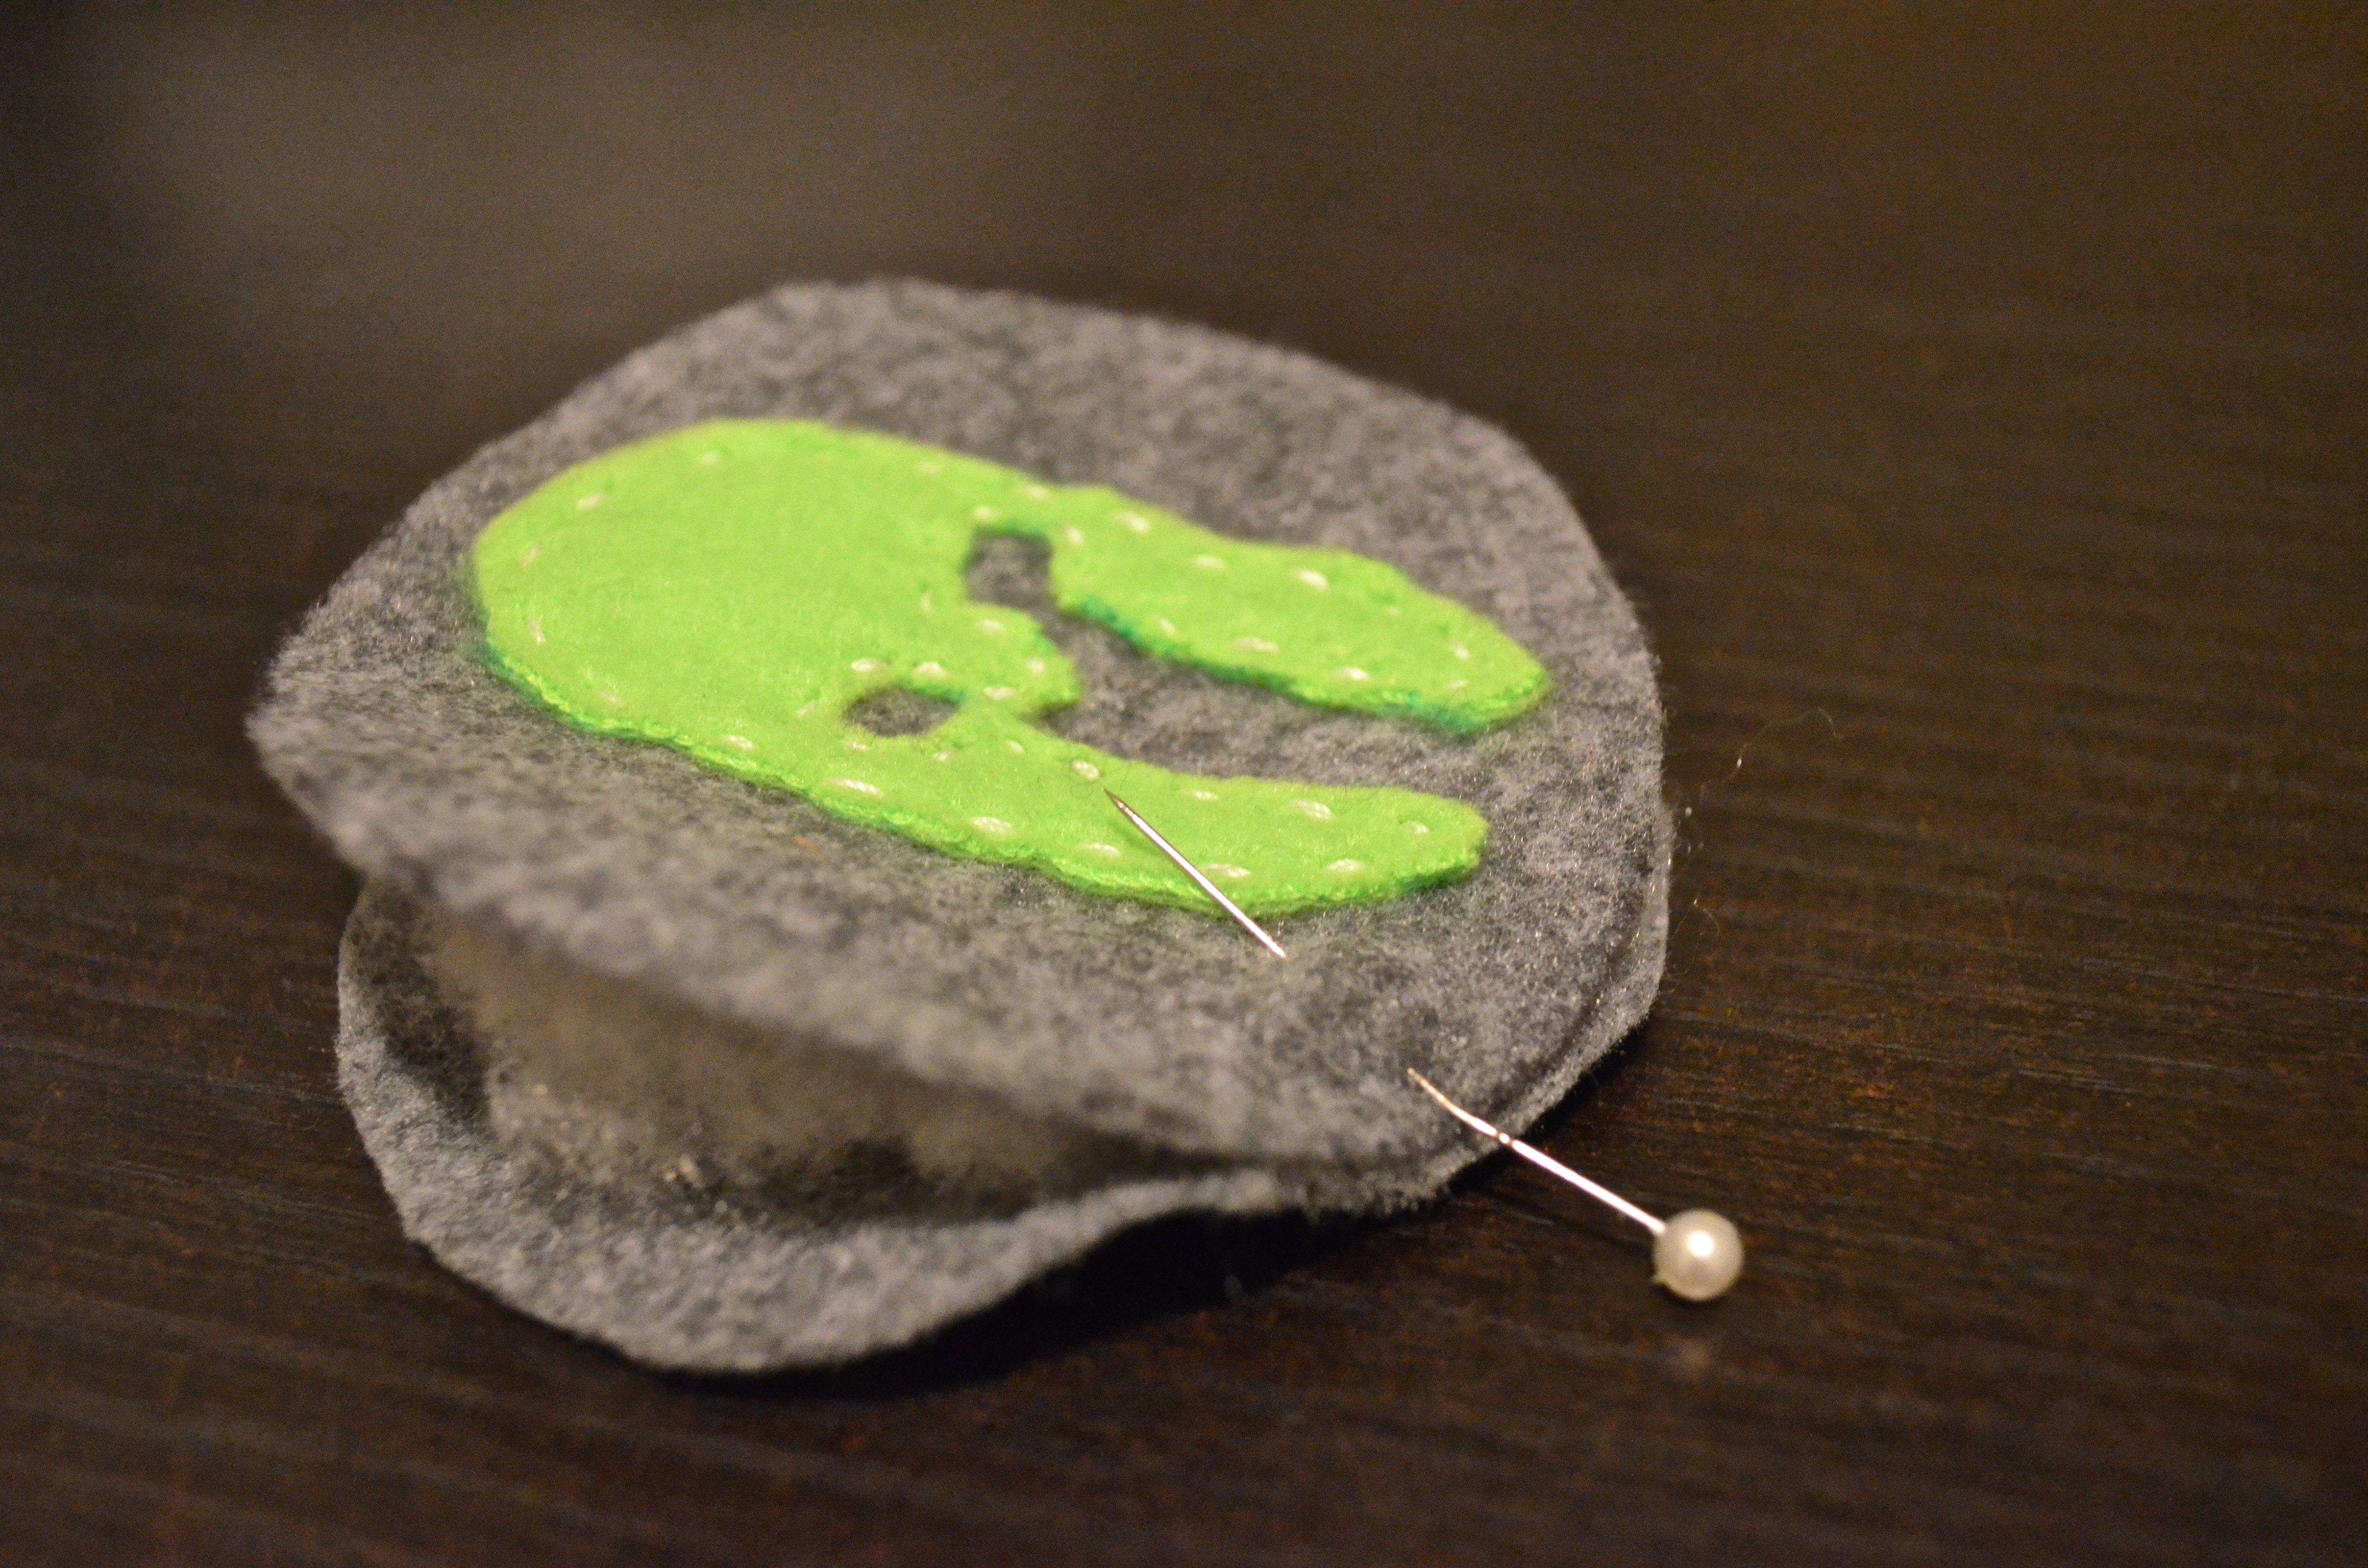
Next, I stitched the logo onto the top circle. I used a basic stitch. You don’t have to worry about securing it much because it’s very light and it’s not really going anywhere.

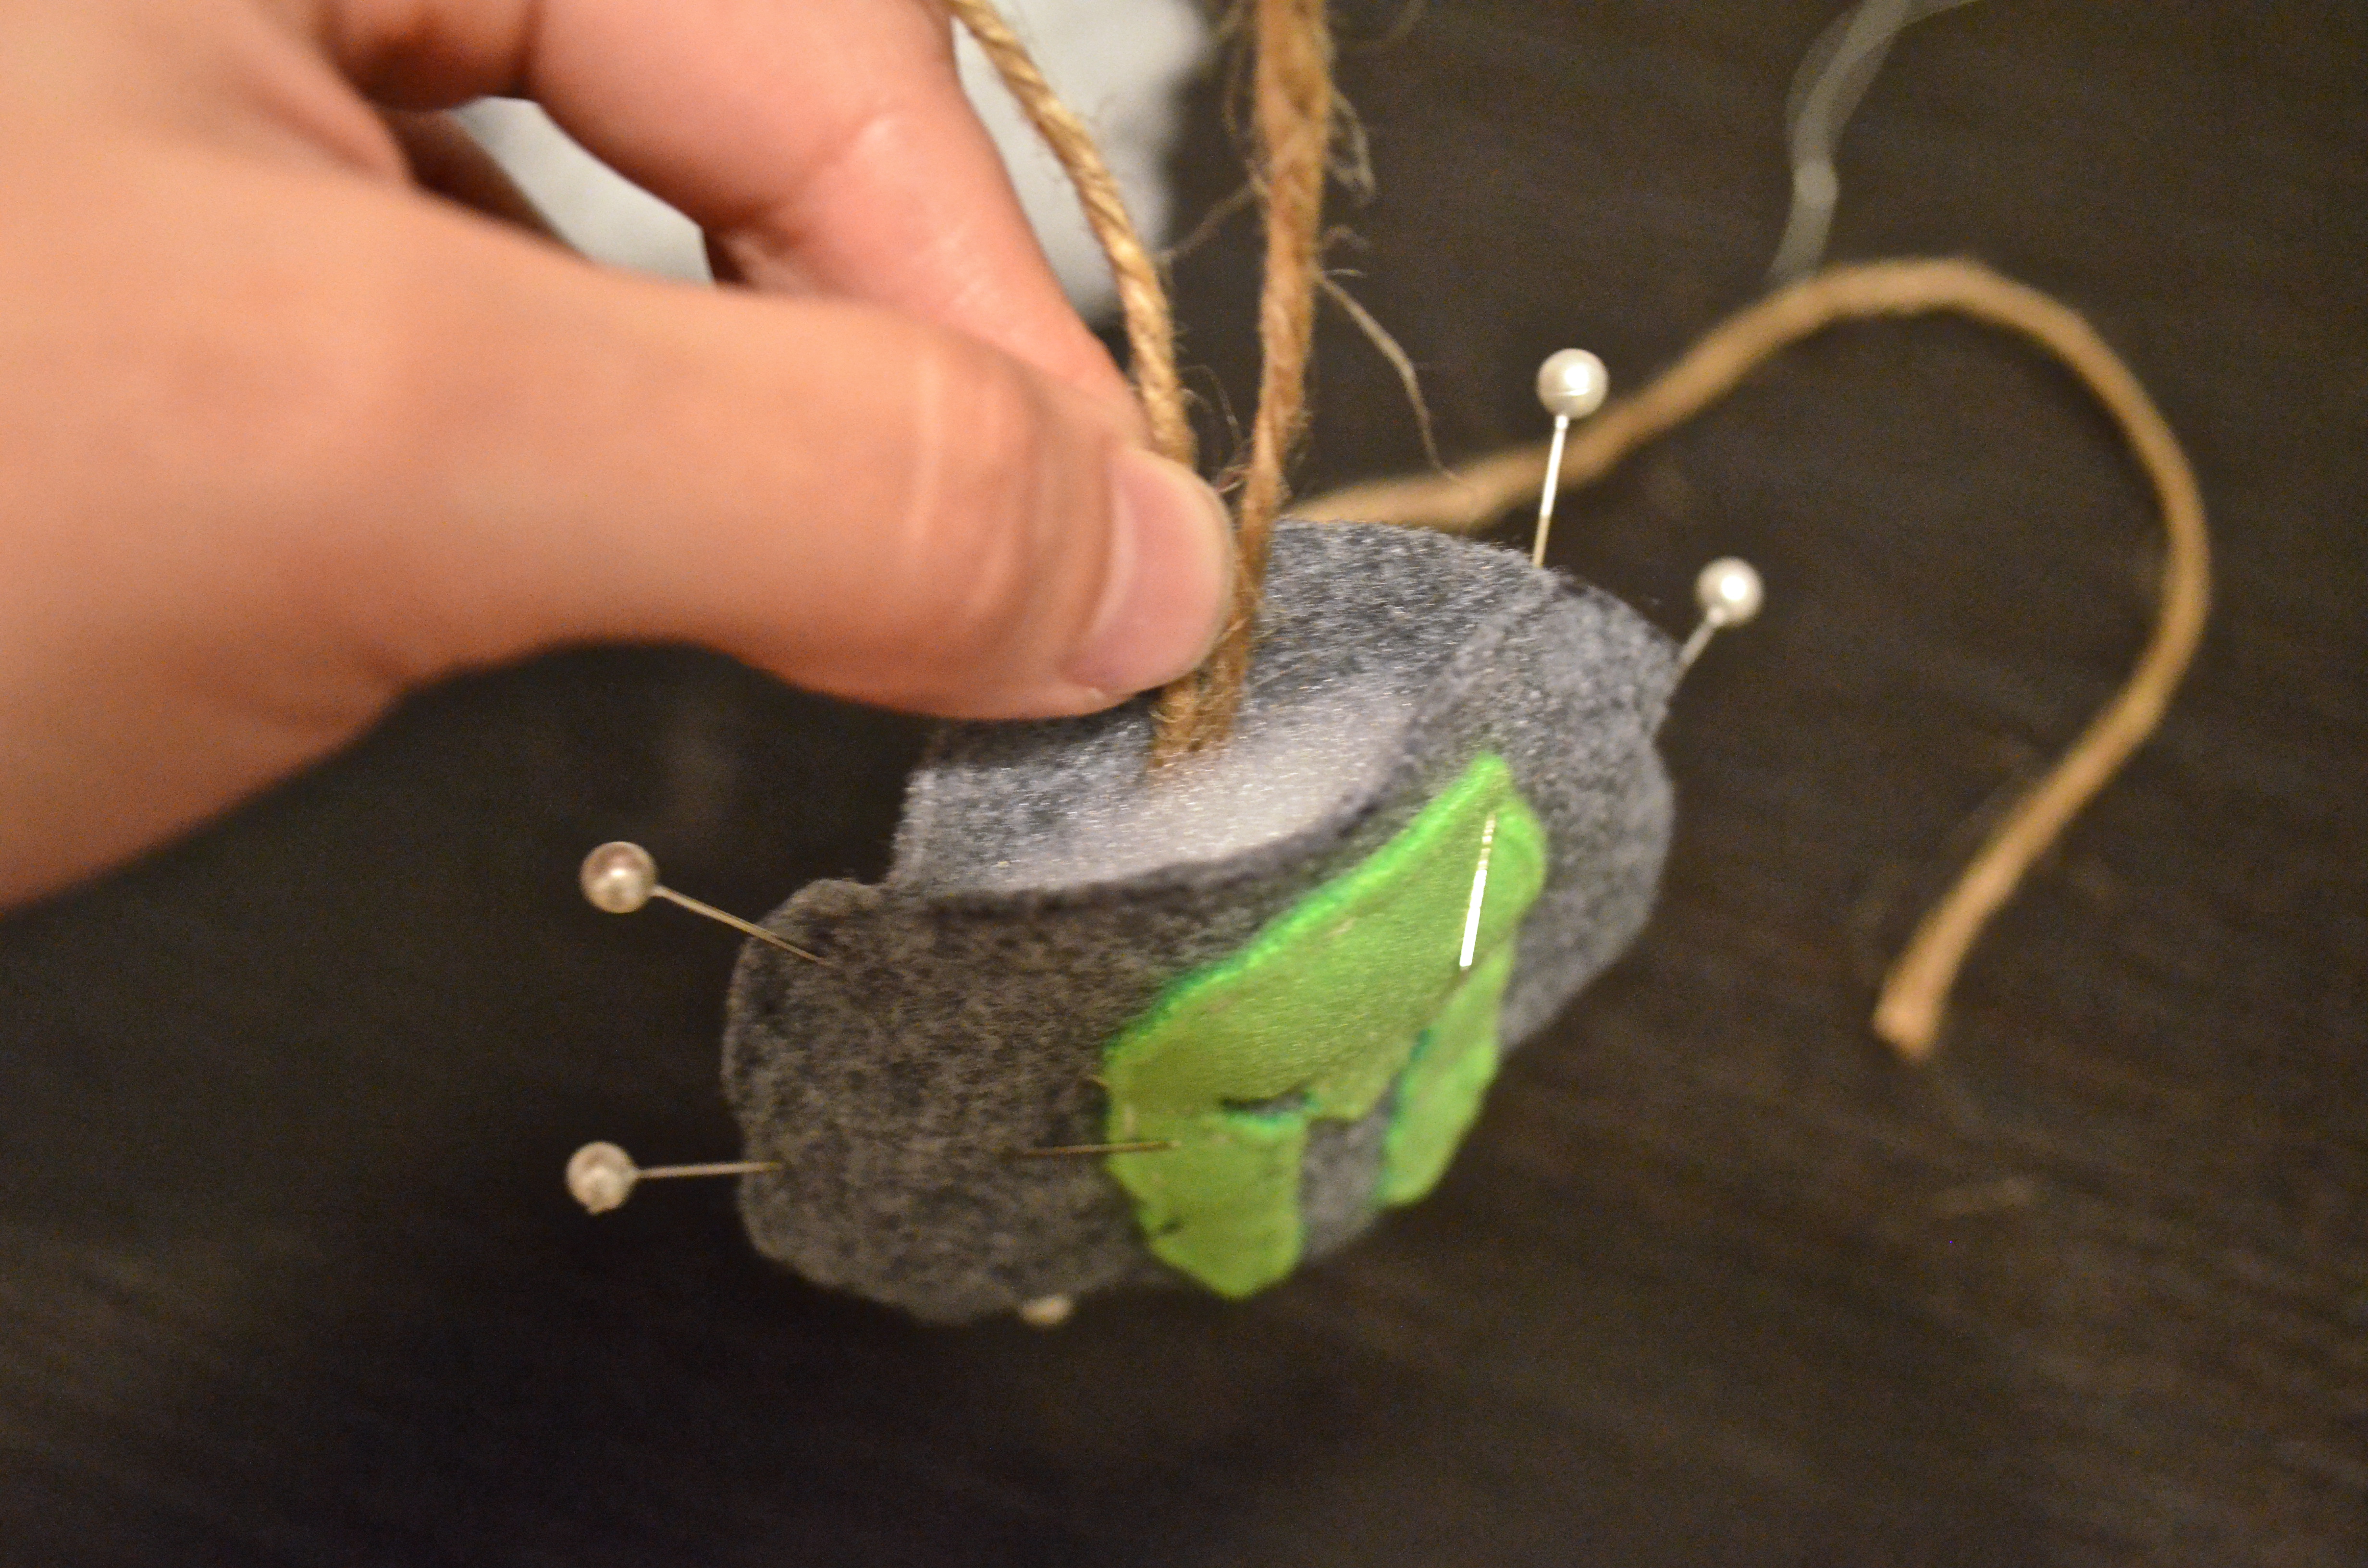
Then, place the cotton batting in between both circles, and pin it together around the edges. Leave a space on top to insert the twine. Once that’s done, secure the twine with a dab of hot glue in between the two circles. This will harden, so you’ll need a stronger needle to thread through the top (this is where the thick thread comes in handy).
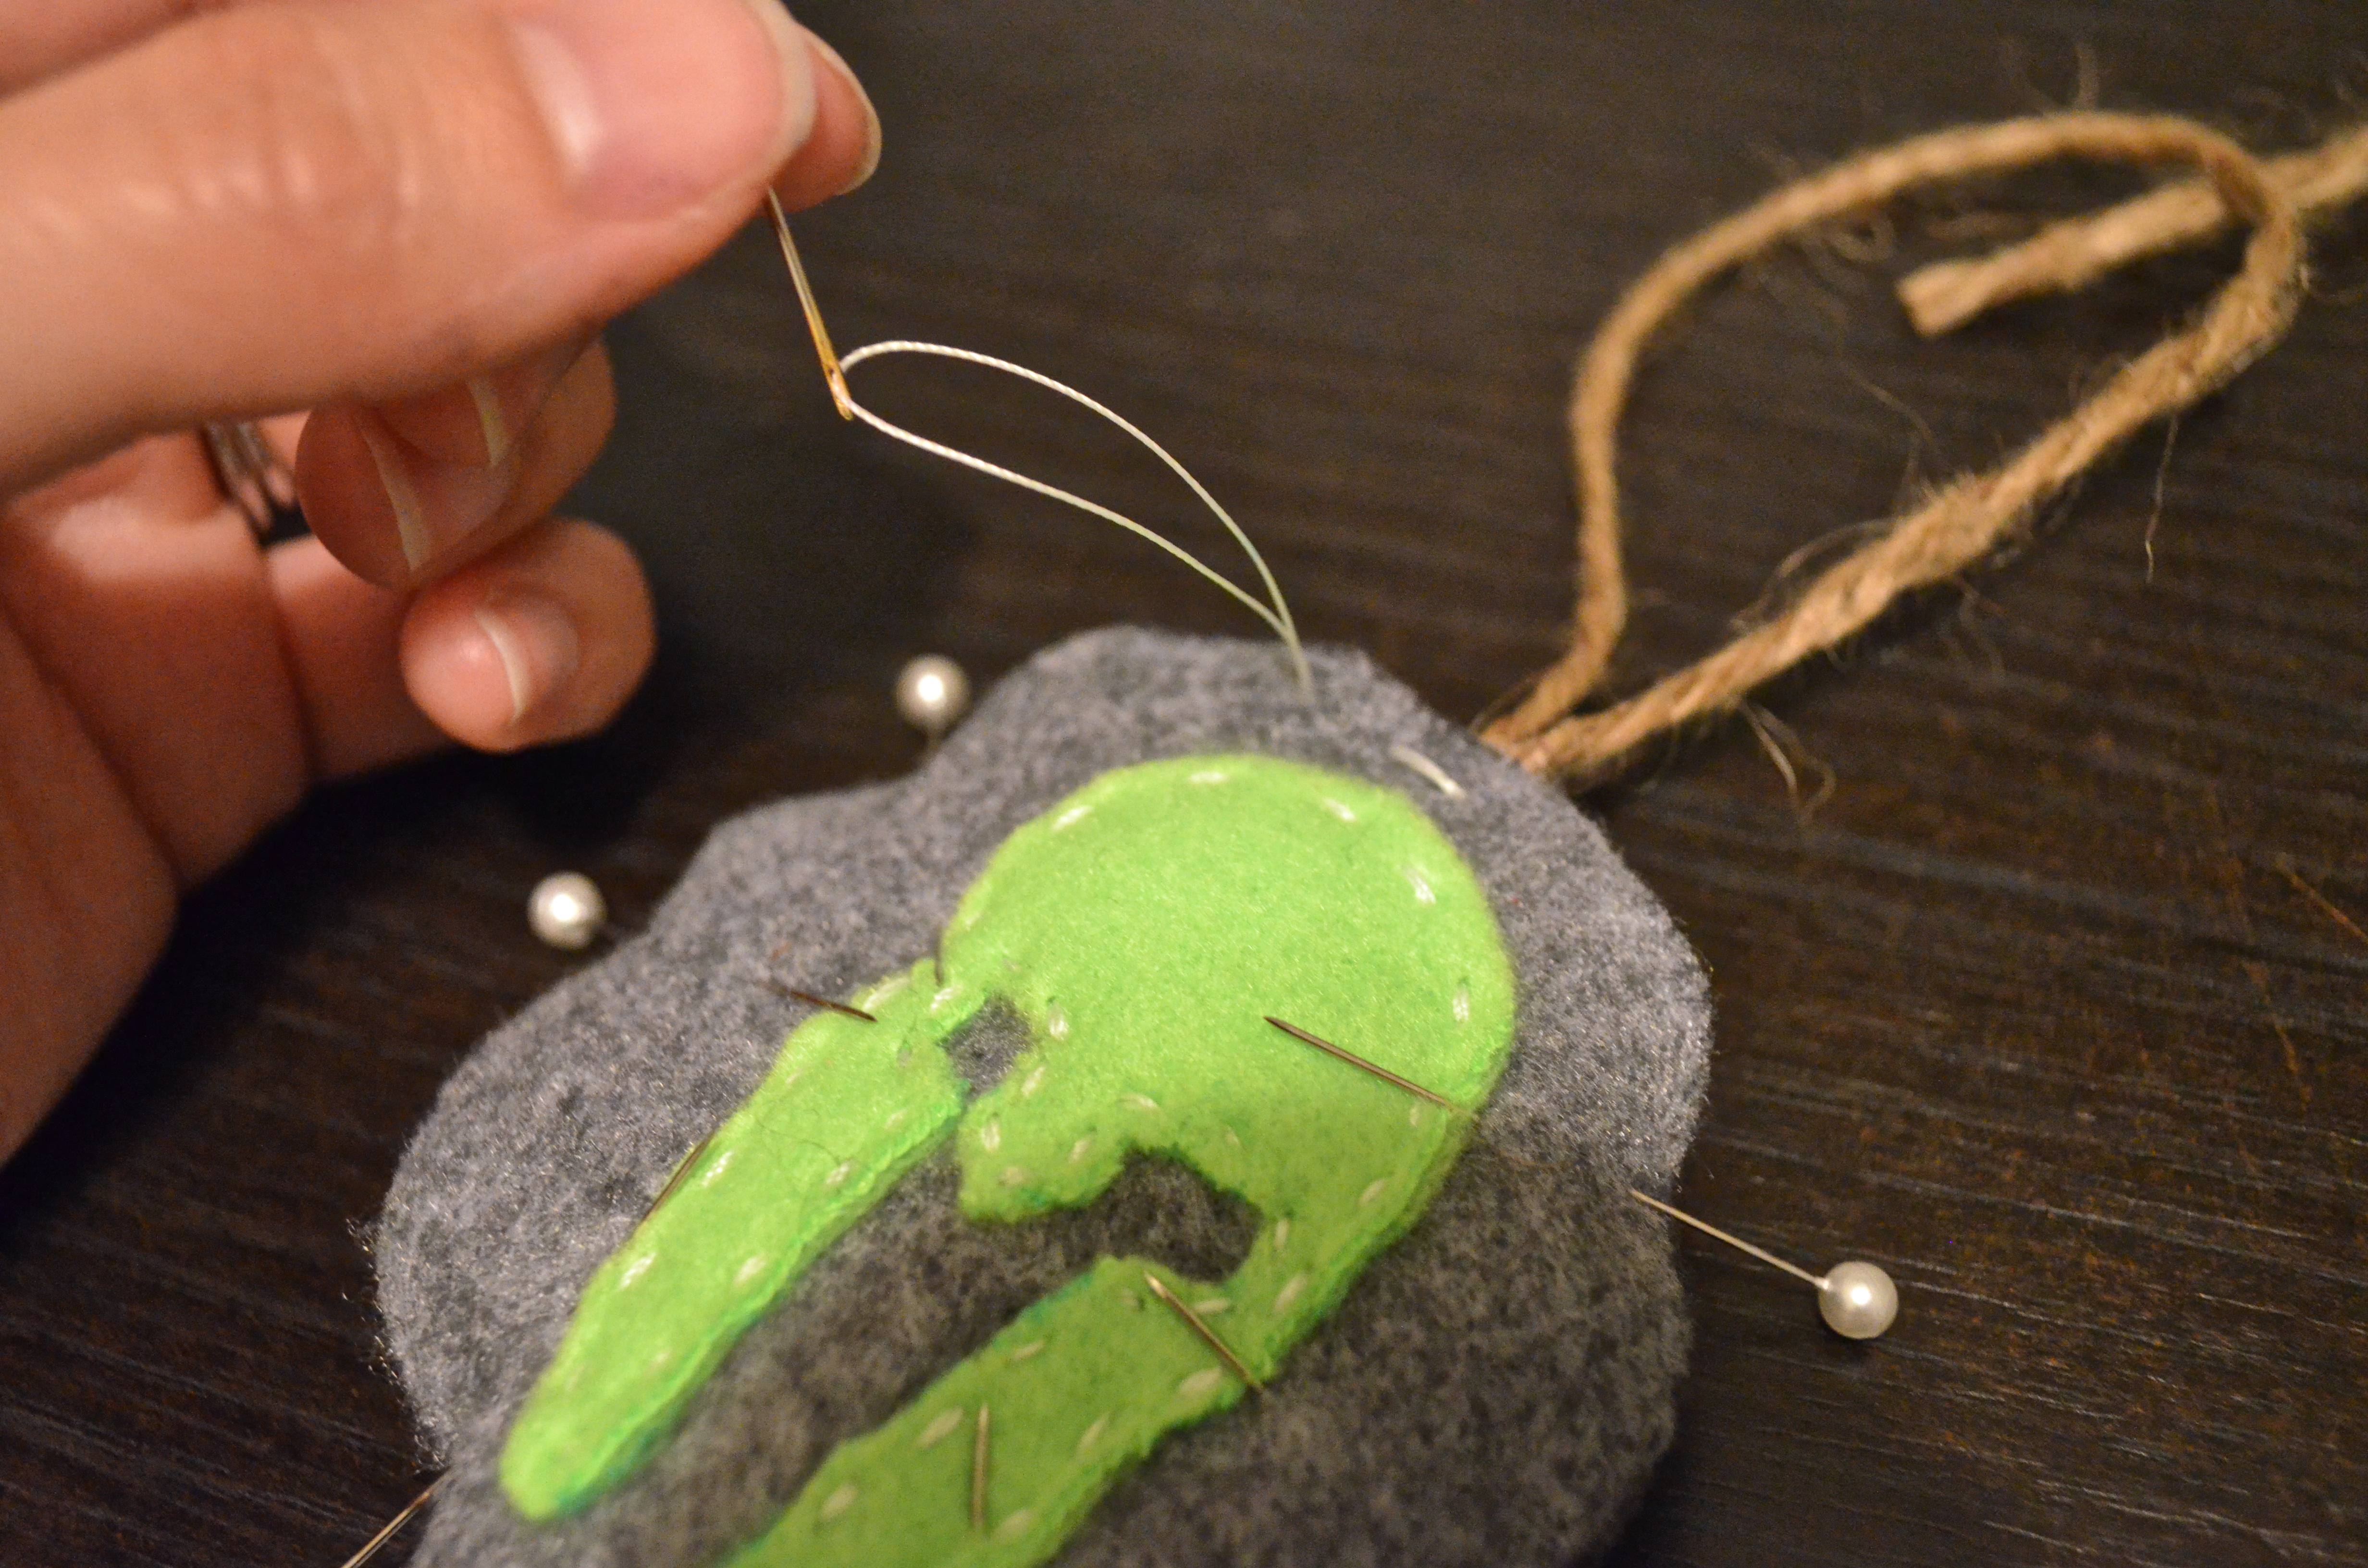
After the twine is secured, simply stitch around the edge of the circle, removing the pins as you go. I started at the top (where the hot glue is hardened). And voila, you have yourself an awesomely easy DIY ornament!

If you try out your own ornament, don’t forget to share! Enjoy this beautiful weekend, and go do something fun!

i love your blog i love your blog i love your bloooooog!